Contrary to the hesitation of some parents and teachers who worry about color coding delaying students' progress by creating lifelong dependence and preventing the student from being able to read music written on the staff, my experience demonstrated to me that color coding can actually speed up the learning process particularly the younger and the students having difficulty reading music. Color coding gives them the opportunity to learn to read music by providing a bridge and boosting their self-esteem.
Here's a step-by-step guide on how to use color coding to teach reading music:
1. Decide on a color-coding system to use for different and give each pitch a different color. For example:
C: Green
D: Blue
E: Yellow
F: Red
G: Navy
A: Orange
B: Purple
2. Decide what you are going to label with these colors and where to have them:
I avoid labeling the piano keys with stickers as much as I can. However, in a couple of cases, I was forced to label them for a limited amount of time and then gradually take them off. if you find yourself in this position, take care to find stickers that are not too sticky and hard to remove once you’re done with them. If your student already knows the names of the keys and can find their way around the piano my advice is not to label the piano keys at all.
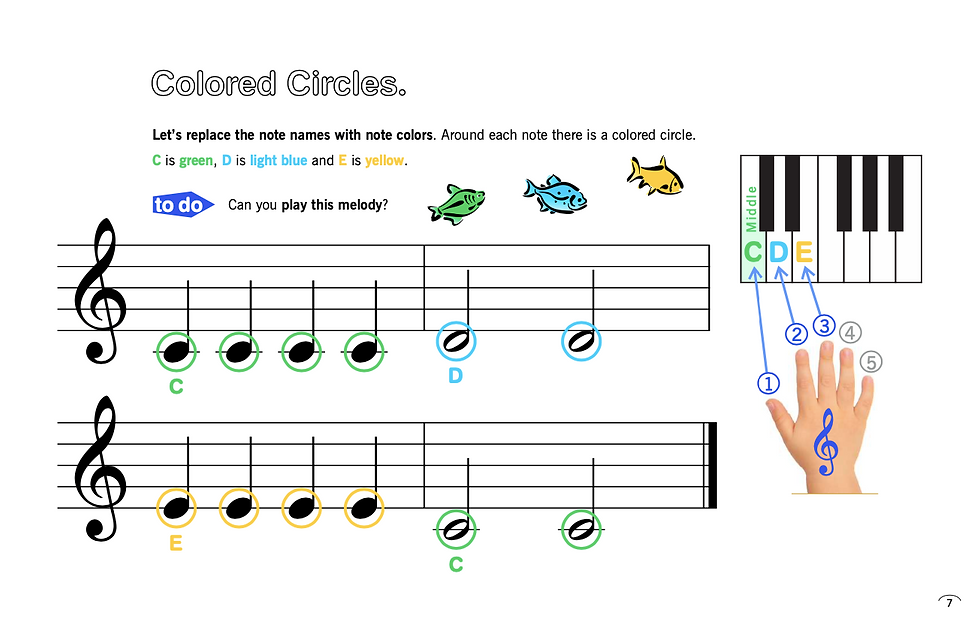
If you have already started to teach note reading, then using an erasable colored pencil, circle the notes on their piece with their respective colors as shown here:
If you haven’t started note reading because your student isn’t ready or very young, start by using the alphabet, like this:
3. Memorise the code:
In no time, your student will memorize this code, the bridge is ready and you will be able to transfer this knowledge to the next step in learning to read the notes. Stay here as much as you need, don't rush this stage, the success of this whole process depends on the student's ability to link the color with the note very quickly and without hesitation.
4. Use the code as a bridge:
Before you start teaching a new piece draw circles with the colors assigned as shown below.
Your student now has something to lean on and to take the stress out of note reading while you move with the lessons as you do with any other student, teaching other aspects of music such as; rhythm, note values, rests…With time the student will learn most of the concepts concerning note reading, such as the time signature, rests, and more importantly the direction of the notes on the sheet with respect to their place on the piano (up means to the right and down means to the left). Be on the watch for signs showing that your student is ready to move to the next step, try not to linger here more than necessary. Experiment moving on to step number 5 every now and then and watch the results.
5. The student colors the notes by themselves :
After some time the student will be ready to draw the circle alone, with your supervision of course. Don’t move to the next step before your student masters this step.
6. Phasing out color:
Start phasing out the colors one by one. Let your student decide which colors to phase out first, second, and so on. Very soon you will be so happy to realize that your student can read sheet music.
Don’t be discouraged if you find out that every now and then, your student will need to use the colors again, especially if the new piece is difficult, or he/she is having a bad day. Consider it as a tool to be used whenever needed, encourage this, this will boost the student’s confidence and independence.
Have you ever tried color coding? Please let me know, I would love to hear how you do it in your studio.


Comments